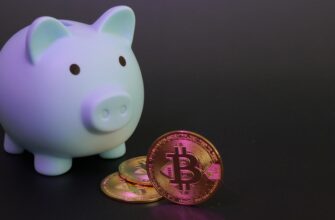
- Why Buy Bitcoin on a Decentralized Exchange?
- Step 1: Set Up a Self-Custody Wallet
- Step 2: Acquire Ethereum (ETH) for Gas Fees
- Step 3: Choose a Reputable DEX Platform
- Step 4: Connect Wallet & Swap ETH for WBTC
- Step 5: Secure Your WBTC
- Pros and Cons of DEX Bitcoin Purchases
- Advantages:
- Limitations:
- Frequently Asked Questions (FAQ)
- Is buying Bitcoin on a DEX anonymous?
- Can I buy native Bitcoin on a DEX?
- What’s the minimum amount I can buy?
- Are DEXs safer than centralized exchanges?
- How do I sell WBTC later?
- Final Tips for Success
Why Buy Bitcoin on a Decentralized Exchange?
Decentralized exchanges (DEXs) offer a revolutionary way to trade cryptocurrencies without intermediaries. Unlike centralized platforms like Coinbase, DEXs let you retain full control of your assets using self-custody wallets. For Bitcoin purchases, this means enhanced privacy (no KYC requirements), reduced hacking risks (funds never leave your wallet), and censorship-resistant trading. While most DEXs operate on blockchains like Ethereum, you’ll typically buy wrapped Bitcoin (WBTC) – a tokenized version pegged 1:1 to Bitcoin’s value. Here’s how to navigate this process securely.
Step 1: Set Up a Self-Custody Wallet
Your self-custody wallet is your gateway to DEXs. Follow these steps:
- Choose a compatible wallet: Install MetaMask (browser/mobile), Trust Wallet (mobile), or Coinbase Wallet.
- Create your wallet: Never share your 12-24 word seed phrase. Store it offline.
- Add network: Most DEXs use Ethereum. Ensure your wallet is set to Ethereum Mainnet.
Step 2: Acquire Ethereum (ETH) for Gas Fees
DEX transactions require ETH to pay network fees (gas):
- Buy ETH from a centralized exchange (e.g., Binance, Kraken) using fiat currency.
- Transfer ETH to your self-custody wallet address.
- Budget $10-$50 for gas fees (varies with network congestion).
Step 3: Choose a Reputable DEX Platform
Top DEXs for buying WBTC:
- Uniswap (Ethereum): Largest DEX with deep liquidity.
- SushiSwap (Ethereum/Polygon): Lower fees on Polygon network.
- PancakeSwap (BNB Chain): Faster transactions, minimal fees.
Always verify the official website URL to avoid phishing scams.
Step 4: Connect Wallet & Swap ETH for WBTC
- Visit your chosen DEX and click “Connect Wallet”.
- Select your wallet provider (e.g., MetaMask) and approve connection.
- In the swap interface:
- Select ETH as “From” token
- Choose WBTC as “To” token (search if not visible)
- Enter ETH amount or use “Max” (minus gas reserve)
- Adjust slippage tolerance (1-3% recommended).
- Click “Swap” and confirm transaction in your wallet.
Step 5: Secure Your WBTC
After transaction confirmation:
- WBTC appears automatically in your connected wallet.
- Transfer to a hardware wallet (Ledger/Trezor) for maximum security.
- To convert WBTC to native Bitcoin, use a cross-chain bridge or centralized exchange withdrawal (requires KYC).
Pros and Cons of DEX Bitcoin Purchases
Advantages:
- No identity verification (KYC)
- Full asset control
- Resistant to platform shutdowns
Limitations:
- Complex for beginners
- High Ethereum gas fees during congestion
- WBTC relies on custodial backing (audited)
Frequently Asked Questions (FAQ)
Is buying Bitcoin on a DEX anonymous?
Transactions are pseudonymous but recorded on public blockchains. While no KYC is required, sophisticated analysis could potentially link activity.
Can I buy native Bitcoin on a DEX?
Most DEXs don’t support native BTC trades. Exceptions like THORChain exist but have limited liquidity. WBTC is the standard solution.
What’s the minimum amount I can buy?
No minimums, but gas fees make small purchases impractical. Aim for at least $100 worth of WBTC.
Are DEXs safer than centralized exchanges?
DEXs eliminate counterparty risk since you hold your assets, but user errors (wrong addresses, scams) are common. Always double-check transactions.
How do I sell WBTC later?
Reverse the process: Swap WBTC for ETH on a DEX, then send ETH to a centralized exchange to cash out.
Final Tips for Success
Start with small test transactions. Bookmark legitimate DEX URLs, monitor gas fees via Etherscan, and never rush transactions. While DEXs empower financial sovereignty, they demand technical awareness. For those prioritizing simplicity, centralized exchanges remain a valid option – but for true ownership, decentralized trading is unmatched.